Photography – What It Means Me
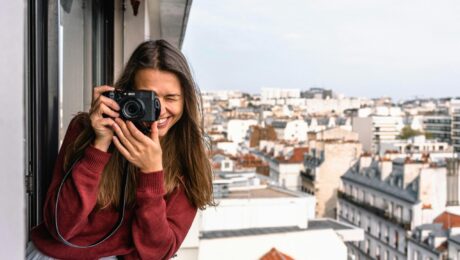
*Photography is a great way to capture the moment and tell a story. It goes with every aspect of life it seems.
*Photography let’s us express ourselves in different ways and gives us a great way to interact with the whole world.
*As a mother of 3 children and dog mommy of 4, photography is a must when it comes to capturing those precious moments. As a content creator and business owner I’ve gotten introduced to many new ways to take my photos and videos. I always love sharing with everyone and helping each other out so I would like to share any new tips or equipment I think are helpful.
- Published in Uncategorized
Must-Have Photography Gear for Beginners: Building the Perfect Starter Kit
Embarking on your photography journey is a thrilling experience, but with the vast amount of gear available, it’s easy to get overwhelmed by the choices. Luckily, you don’t need the most expensive or complex equipment to get started. With the right essentials, you can create high-quality photos and grow as a photographer without breaking the bank. In this guide, we’ll explore the must-have photography gear for beginners, from cameras to tripods, with a focus on affordable options that won’t compromise on quality.
The camera is, of course, the foundation of any photographer’s kit. For those just starting out, it’s essential to find a camera that offers both ease of use and room to grow. DSLR and mirrorless cameras are both great options. DSLRs, like the Canon EOS Rebel series or the Nikon D3500, are known for their durability and versatility, with a range of manual settings to help you learn the craft. Mirrorless cameras, such as the Sony Alpha a6100 or the Fujifilm X-T200, are more compact but equally powerful, making them a favorite for beginners who want a lighter, more portable option. The key is to choose a camera that fits your style and budget while offering manual controls so you can explore creative possibilities as your skills improve.
Alongside the camera, lenses play a crucial role in shaping the quality of your photos. While most cameras come with a kit lens, typically in the 18-55mm range, investing in an additional lens can significantly enhance your creative capabilities. A prime lens, like the 50mm f/1.8, is an affordable choice that delivers beautiful depth of field and sharp images, making it ideal for portraits and low-light photography. As a beginner, starting with these basic lenses allows you to cover a wide range of photographic styles without needing an extensive and expensive lens collection.
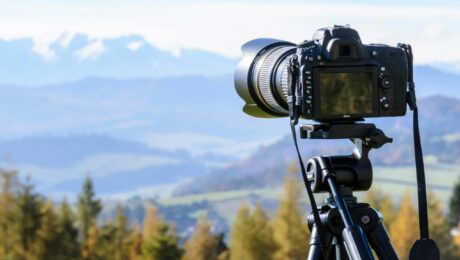
One often overlooked yet essential piece of gear for beginners is a sturdy tripod. A tripod provides stability for long-exposure shots, low-light scenes, or even self-portraits. When shopping for one, look for lightweight options that are easy to carry yet durable enough to handle your camera’s weight. Brands like Manfrotto and Amazon Basics offer affordable yet reliable tripods perfect for beginners. Having a tripod not only helps avoid camera shake but also allows you to experiment with more advanced techniques like time-lapse photography or shooting at slower shutter speeds.
Memory cards and storage solutions are also critical to any beginner’s kit. When shooting high-resolution images, especially in RAW format, memory cards can fill up quickly. Invest in SD cards with at least 64GB of storage and a fast write speed to ensure smooth shooting, especially in burst mode. It’s also wise to have an external hard drive or cloud storage solution for backing up your images. Losing your work due to a corrupted memory card can be frustrating, so it’s best to get into the habit of backing up your photos regularly.
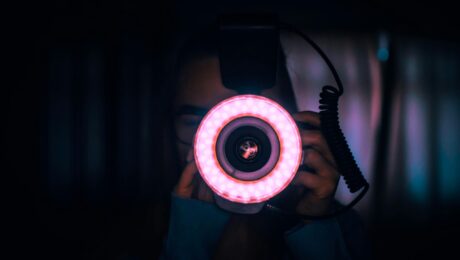
Lastly, don’t forget about lighting and accessories. Natural light is a great resource, but having a simple external flash or reflector can drastically improve your indoor or low-light photos. Entry-level flashes are relatively inexpensive and easy to use, offering more control over lighting than your camera’s built-in flash. A reflector, on the other hand, helps you manipulate available light to your advantage, whether you’re shooting portraits or still-life scenes.
Starting your photography journey doesn’t require a massive investment. By focusing on a few essential pieces of gear, you can capture stunning images and gradually build up your equipment as you grow. Look for affordable, high-quality options that suit your current needs, and remember that the most important tool in photography is creativity—something no amount of gear can replace.
- Published in Beginners
Moms Review – Magnetic Picture Frames
These are magnetic photo frames with adhesive backing that come in a pack of 5 with varying sizes.
As a mom of three children I think it’s important to share any good information or life hacks I can find and these frames make life simpler for sure. Taking any annoyance out of the day for anyone is a win in my book.
It’s very easy to switch out the pictures in the frames because it’s magnetized. Makes great for lists to update to help moms out or teachers to use in classrooms so it’s easy to keep up with the constant changing children and agendas. These frames are perfect for awards or certificates and the sticky back makes it safe to use in rentals or dorm rooms. As a mom it’s helpful to put a blank paper in a frame and use a dry erase marker to use as a checklist or reminder sheet. These frames are so versatile that there’s no wrong choice.
- Published in Uncategorized
Mastering the Basics: A Beginner’s Guide to Photography
Photography is an art form that allows us to capture moments in time, express ourselves creatively, and share our unique perspective with the world. If you’re new to photography, it can seem overwhelming at first with all the technical jargon and equipment options available. But fear not! In this beginner’s guide, we will cover the basics of photography to help you get started on your journey to becoming a skilled photographer.
Understand Your Camera: The first step in mastering the basics of photography is getting familiar with your camera. Whether you have a DSLR, mirrorless, or even just a smartphone camera, take some time to read the manual and learn about its features and settings. Experiment with different modes like aperture priority, shutter priority, and manual mode to understand how they affect your images.
Learn Composition Techniques: Composition plays a crucial role in creating visually appealing photographs. Familiarize yourself with basic composition techniques such as the rule of thirds, leading lines, framing, and symmetry. Practice composing your shots using these techniques to improve the overall quality of your photos.
Master Lighting: Lighting is one of the most important aspects of photography. Understanding how light affects your subject can make or break a photo. Experiment with natural light by shooting during golden hour or diffusing harsh sunlight with a reflector or diffuser. You can also play around with artificial lighting sources like flash or studio lights to create different effects.
Edit Your Photos: Post-processing is an essential part of photography that can help enhance your images and bring out their full potential. There are many editing software options available such as Adobe Lightroom, Photoshop, or free apps like Snapseed or VSCO. Experiment with adjusting exposure, contrast, saturation, and sharpness to fine-tune your photos before sharing them.
Practice Regularly: Like any skill, practice makes perfect when it comes to photography. Take your camera wherever you go and challenge yourself to shoot different subjects in various lighting conditions. Join photography groups or workshops to learn from others and gain inspiration for new ideas.
Congratulations! You’ve now learned the basics of photography and are well on your way to mastering this art form. Remember that photography is a journey of continuous learning and growth, so don’t be afraid to experiment and push yourself out of your comfort zone. Keep practicing regularly, honing your skills in composition and lighting techniques, experimenting with editing software, and most importantly – have fun capturing moments through your lens! With dedication and persistence, you’ll soon be able to create stunning photographs that truly reflect your unique vision as a photographer.
- Published in Uncategorized
Mastering the Art of Portrait Photography: Techniques for Perfect Shots
Portrait photography is a beautiful and intimate way to capture the essence of a person in a single image. Whether you’re a professional photographer or just someone who loves taking pictures, learning the techniques for perfect portrait shots can take your photography skills to the next level. From lighting and composition to posing and editing, there are several key elements to consider when creating stunning portraits. In this blog post, we’ll explore some essential techniques that will help you master the art of portrait photography and capture images that truly speak to the soul.
Lighting is key: One of the most important aspects of portrait photography is lighting. Natural light can create beautiful, soft shadows and highlights that enhance the features of your subject. When shooting outdoors, try to schedule your sessions during golden hour (early morning or late afternoon) for the best lighting conditions. If shooting indoors, experiment with different light sources such as window light or artificial lights to create interesting effects. Remember to always pay attention to how the light falls on your subject’s face and adjust accordingly for flattering results.
Composition matters: The composition of your portrait can make or break the overall impact of the image. Pay attention to framing, rule of thirds, leading lines, and symmetry when setting up your shot. Experiment with different angles and perspectives to add visual interest to your portraits. Don’t be afraid to get creative with composition – sometimes breaking the rules can lead to unique and compelling images.
Posing techniques: Posing is another crucial element in portrait photography. Help your subjects feel comfortable in front of the camera by giving them clear directions on how to pose. Encourage natural movements and expressions rather than stiff poses. Pay attention to body language, facial expressions, hand placement, and posture to create dynamic and engaging portraits. Remember that small adjustments can make a big difference in how your subject looks in the final image.
Editing for perfection: Post-processing plays a significant role in enhancing your portrait photographs. Use editing tools like Adobe Lightroom or Photoshop to fine-tune exposure, color balance, contrast, sharpness, and skin retouching. Be careful not to over-edit your images – aim for a natural look that enhances rather than alters reality. Experiment with different editing styles and presets until you find a look that suits your personal aesthetic.
Practice makes perfect: Like any skill, mastering portrait photography takes time and practice. Don’t be discouraged if your first few attempts don’t turn out as expected – keep experimenting, learning from mistakes, and honing your craft with each session. Take inspiration from other photographers, attend workshops or classes, and seek feedback from peers to improve your skills continuously.
Portrait photography is an art form that allows us to capture fleeting moments in time and preserve memories for years to come. By mastering techniques such as lighting, composition, posing, editing, and practicing regularly, you can elevate your portrait photography skills and create stunning images that tell a story about your subjects’ personalities and emotions. So grab your camera, find a willing model (or use yourself), and start capturing beautiful portraits that showcase the beauty of the human spirit.
- Published in Uncategorized
Exploring Urban Photography: Capturing the Beauty of Cityscapes
Urban photography is a captivating art form that allows photographers to capture the vibrancy and energy of city life. From bustling streets to towering skyscrapers, there is no shortage of subjects to photograph in urban environments. In this blog post, we will explore the beauty of cityscapes through the lens of urban photography. We will discuss techniques for capturing stunning images, tips for finding inspiration in urban settings, and the importance of storytelling in your photographs.
One of the key elements of urban photography is composition. When shooting cityscapes, it’s important to pay attention to lines, shapes, and patterns that can help create a visually interesting image. Look for leading lines that draw the viewer’s eye through the photo, such as roads or buildings. Experiment with different angles and perspectives to find unique compositions that highlight the beauty of the cityscape.
Lighting is another crucial aspect of urban photography. The harsh light of midday can create harsh shadows and blown-out highlights, so try shooting during the golden hours – early morning or late afternoon – when the light is soft and warm. This can add a beautiful glow to your cityscape photos and enhance the mood of your images. Don’t be afraid to experiment with different lighting conditions and see how they affect the look and feel of your photographs.
In addition to composition and lighting, storytelling plays a vital role in urban photography. Every city has its own unique character and atmosphere, so try to capture these elements in your photos. Look for moments that tell a story or evoke emotions – whether it’s a bustling street scene or a quiet moment in an alleyway. By focusing on capturing moments that resonate with viewers, you can create powerful images that leave a lasting impression.
Finding inspiration in urban settings can sometimes be overwhelming due to the sheer amount of visual stimuli present in cities. To combat this, try exploring different neighborhoods or areas within a city to find unique perspectives and subjects for your photos. Pay attention to details such as street art, architecture, or people going about their daily lives – these small moments can often make for compelling photographs.
Urban photography offers endless opportunities for creativity and exploration. By paying attention to composition, lighting, storytelling, and finding inspiration in urban settings, you can capture stunning images that showcase the beauty of cityscapes. Whether you’re drawn to capturing bustling city streets or quiet architectural details, there is something truly magical about seeing cities through the lens of a camera. So grab your camera, hit the streets, and start exploring urban photography today!
- Published in Uncategorized
Mastering the Art of Lighting in Photography
Lighting is one of the most crucial elements in photography. It can make or break a photo, setting the mood, highlighting details, and creating depth. Understanding how to use both natural and artificial light effectively can take your photography skills to the next level. In this blog post, we will explore the different types of lighting, tips for using them in photography, and how to manipulate light to achieve stunning results.
Natural light is often considered the most flattering type of light for photography. The key is to pay attention to the quality of natural light at different times of day. The golden hour, which occurs during sunrise and sunset, provides soft, warm light that can add a beautiful glow to your photos. Midday sun, on the other hand, produces harsh shadows that can be challenging to work with. When shooting outdoors, look for open shade or use a reflector to soften harsh shadows and create even lighting.
Artificial light sources such as studio lights or speed lights give you more control over the lighting conditions. Studio lights are great for indoor shoots where you need consistent and adjustable lighting. Experiment with different setups like key lights, fill lights, and rim lights to create depth and dimension in your photos. Speedlights are portable flashes that can be used on-camera or off-camera to add extra light when shooting in low-light conditions.
When combining natural and artificial light sources in photography, it’s important to balance them properly. You can use natural light as your main source of illumination and supplement it with artificial light to fill in shadows or add highlights. Alternatively, you can use artificial light as your primary source and use natural light as a backlight or accent light. Play around with different combinations until you find a setup that works best for the mood you want to convey in your photos.
Manipulating light through modifiers like diffusers, reflectors, and gels can also enhance your photos. Diffusers soften harsh lighting by spreading it out evenly while reflectors bounce light back onto your subject for a more flattering effect. Gels are colored filters that can be placed over artificial lights to change the color temperature of the scene. Experiment with different modifiers to see how they affect the mood and atmosphere of your photos.
In conclusion, mastering the art of lighting in photography takes time and practice but is well worth the effort. By understanding how natural and artificial light sources work and learning how to manipulate them effectively, you can elevate your photography skills and create stunning images that capture emotion and beauty. Remember that there are no strict rules when it comes to lighting – experimentation is key! So go out there, play with different lighting techniques, and watch your photography skills soar.
Whether you’re shooting portraits, landscapes, still life, or any other subject matter, lighting plays a crucial role in creating impactful photographs. By learning how to use both natural and artificial light sources effectively and experimenting with different lighting techniques and modifiers, you can take your photography skills to new heights. So grab your camera, step into the world of lighting mastery – you’ll be amazed at what you can create!
- Published in Uncategorized
Editing Like a Pro: Essential Tips for Post-Processing Your Photos
Editing is a crucial step in the photography process that can elevate your photos from good to great. Whether you’re a beginner or a seasoned pro, knowing how to post-process your images effectively can make a world of difference in the final result. In this blog post, we’ll cover some essential tips and techniques to help you edit like a pro and enhance the quality of your photos.
Start with the basics: Before diving into more advanced editing techniques, it’s important to master the basics of photo editing. This includes adjusting exposure, contrast, white balance, and sharpness. Use editing software like Adobe Lightroom or Photoshop to make these basic adjustments and ensure that your photo looks its best before moving on to more complex edits.
Develop a consistent editing style: One way to take your photo editing skills to the next level is by developing a consistent editing style. This could be achieved through using specific presets or filters that give your photos a cohesive look and feel. Experiment with different styles until you find one that resonates with you and reflects your unique vision as a photographer.
Don’t overdo it: While it can be tempting to go overboard with editing effects, less is often more when it comes to post-processing photos. Avoid excessive use of filters, saturation, and sharpening as this can result in unnatural-looking images. Instead, focus on enhancing the natural beauty of your photos without sacrificing their authenticity.
Pay attention to details: When editing photos, pay close attention to details such as lighting, composition, and color balance. These small adjustments can make a big difference in the overall quality of your images. Take the time to zoom in and inspect each part of the photo carefully to ensure that no detail goes unnoticed during the editing process.
Practice makes perfect: Like any skill, mastering photo editing takes practice and patience. Take the time to experiment with different tools and techniques until you feel confident in your abilities. Don’t be afraid to seek feedback from other photographers or take online courses to improve your skills further.
Editing like a pro requires time, dedication, and an eye for detail. By following these essential tips for post-processing your photos, you can enhance the quality of your images and create stunning visuals that capture the essence of your subject matter effectively. Remember that there’s no one-size-fits-all approach to photo editing – find what works best for you and develop your unique style over time. So go ahead, grab those raw files, and start experimenting with different editing techniques – you’ll be amazed at how much potential lies within each image waiting to be unlocked through thoughtful post-processing!
- Published in Uncategorized
10 Tips for Capturing Stunning Landscape Photos
Landscape photography is a popular and rewarding genre that allows photographers to capture the beauty of nature in all its glory. From sweeping vistas to intimate details, there are endless possibilities for creating stunning landscape photos. However, capturing breathtaking landscapes requires more than just pointing and shooting. In this blog post, we will share 10 tips to help you improve your landscape photography skills and take your photos to the next level.
Plan your shot: Before heading out to capture landscapes, do some research on the location you plan to shoot. Look for interesting compositions, potential lighting conditions, and points of interest that will make your photos stand out. Planning ahead can help you make the most of your time in the field and increase your chances of capturing stunning images.
Use a tripod: A sturdy tripod is essential for landscape photography, as it allows you to stabilize your camera and capture sharp images, especially in low-light situations or long exposures. Invest in a good-quality tripod that is lightweight and easy to carry with you on outdoor shoots.
Pay attention to lighting: Light plays a crucial role in landscape photography, so it’s important to be mindful of the way light interacts with your scene. Golden hour – the hour after sunrise and before sunset – offers soft, warm light that can add depth and dimension to your photos. Experiment with different lighting conditions to see how they affect the mood and atmosphere of your images.
Use leading lines: Leading lines are a powerful compositional tool that can guide the viewer’s eye through your image and create a sense of depth and perspective. Look for natural elements like roads, paths, rivers, or tree branches that can lead toward your main subject and add visual interest to your landscape photos.
Capture movement: To add dynamism and energy to your landscape shots, try incorporating elements of movement into your compositions. For example, use a slow shutter speed to blur moving waterfalls or clouds, creating a sense of motion in an otherwise static scene.
Experiment with different perspectives: Don’t be afraid to get down low or climb up high to find unique vantage points for capturing landscapes from unusual angles. Changing your perspective can dramatically alter the composition and feel of your photographs. Consider shooting from ground level to accentuate foreground elements or finding an elevated position for a bird’s-eye view of an expansive landscape.
Focus on foreground interest: Including interesting elements in the foreground can enhance the depth of your images and draw viewers in. Look for textures, colors, or shapes that can complement your main subject in the background, helping to create a more engaging composition.
Use the rule of thirds: The rule of thirds is a fundamental guideline in photography that encourages you to divide your frame into nine equal parts by using two horizontal and two vertical lines. Positioning key elements along these lines or at their intersections can lead to a more balanced and visually appealing composition.
Don’t be afraid to edit: Post-processing is an essential part of modern photography. Use editing software to enhance your landscape photos, adjusting elements such as exposure, contrast, and saturation to reinforce the mood you wish to convey. However, aim to maintain a natural look; over-editing can detract from the authenticity of your images.
Stay patient and persevere: Landscape photography often requires waiting for the perfect moment, whether it’s the right light or weather conditions. Be patient, and don’t rush through your shoot. Sometimes, the most stunning photos come together slowly, and being present in the moment will lead to greater creativity and satisfaction in your work.
Capturing stunning landscape photos takes practice, patience, and a keen eye for detail. By implementing these tips, you’ll be well on your way to improving your landscape photography skills and creating breathtaking images that showcase the beauty of the natural world. Remember, photography is not just about technical skills; it’s also about expressing your unique perspective and emotions through your lens. So get out there, explore new locations, and let your creativity flow. Happy shooting!
- Published in Uncategorized
Travel Photography: Capturing the Essence of Your Adventures
Traveling is an incredible way to explore new cultures, landscapes, and experiences. And what better way to preserve those memories than through the art of photography? Travel photography allows us to capture the essence of our adventures, freeze moments in time, and share our stories with others. In this blog post, we’ll explore the importance of travel photography, tips for capturing stunning images, and how you can use your photos to create lasting memories.
Plan Ahead: Before embarking on your travels, take some time to research your destination. Look up popular landmarks, local festivals, and hidden gems that you don’t want to miss. This will help you plan your shot list and ensure that you capture all the highlights of your trip. Keep in mind the best times of day for lighting – early morning and late afternoon often provide the most beautiful light for photography.
Tell a Story: Instead of just taking random snapshots of what you see, try to tell a story with your photos. Capture the local culture, people going about their daily lives and unique traditions that make each place special. Look for interesting details like colorful street markets, intricate architecture, or striking landscapes that convey the essence of your destination.
Experiment with Composition: Don’t be afraid to get creative with your composition! Play around with different angles, perspectives, and framing techniques to make your photos more visually appealing. Try shooting from a low angle to add depth to your images or experiment with leading lines to draw the viewer’s eye into the scene.
Capture Emotions: One of the most powerful aspects of travel photography is its ability to evoke emotions and memories. Look for candid moments that capture genuine expressions – whether it’s a child playing in a village square or a couple sharing a quiet moment by the ocean. These authentic moments will bring your photos to life and allow viewers to connect with your experiences on a deeper level.
Edit Thoughtfully: While editing software can help enhance your photos, it’s important not to rely too heavily on post-processing effects. Aim for natural-looking edits that enhance rather than detract from the beauty of your images. Adjust exposure levels, contrast, and colors subtly to bring out the best in each photo while staying true to the original scene.
Travel photography is not just about taking pretty pictures – it’s about capturing moments that tell a story and evoke emotions long after you’ve returned home. By following these tips and techniques, you can elevate your travel photos from simple snapshots to stunning works of art that truly capture the essence of your adventures. So grab your camera, pack your bags, and embark on a journey filled with unforgettable memories waiting to be captured through the lens!
- Published in Uncategorized
- 1
- 2


